Pages

Monday, May 6, 2013

Mommy and Me Sewing Fun

My little one has been around me sewing since she was born, and she has always had some interest in what I was doing. She even has her own little sewing machine toy to play with in my sewing room. She gets fabric from the scrap drawer, decides "I'm going to make you a dress mommy," and goes to work "stitching." While she is good at and has fun pretending, I thought it might be fun for her to do the real thing and have something to show off when she was done.

So, I cut her the pieces for a simple fold over purse from a bit of felt. I punched holes in the edges where the stitches would go, and I threaded a blunt tapestry needle with yarn.


 I sat with her and reminded her on which side to put the needle in and to be careful when pulling it out. I also knotted off her threads for her. I love watching those little hands work!


And look how proud she is of her finished purse! This is a nice and simple project to do with the kiddo that is interested in sewing like a big kid. I'd like to prep an easy hat for her to sew up next! 

Did you learn to sew when very young? Or, have you taught a little one to sew? What are some other good starter projects? 

Friday, May 3, 2013

Giveaway Winner!

It was great to read so many comments from people who are interested in trying out lingerie sewing! But, sadly, the Random Number Generator could only choose one winner.

It came up number 2! Congratulations, Foster! She said "I've never really dared to venture into lingerie sewing, but perhaps the Bambi Bra will change all that!"


Perhaps it will Foster! I look forward to seeing your version of this lovely bra! 
Well, that was fun! Thanks again to all of you who commented, and many thanks to Sarah of Ohhh Lulu! Happy Friday, all!

Thursday, May 2, 2013

Roadside Botany- Spring Spectacular

This evening I took a walk around the yard and neighborhood with the fam documenting the latest stage of the spectacular spring bloom we have enjoyed in this most beautiful place in which we live.

I have never seen so many trilliums in one place. In fact, I can't imagine that there is a place where there is a higher concentration of this lovely flower than what I saw on our street today. They were mostly white and light pink, but I also spotted some delicate burgundy flowers.


This property down the street from our house is carpeted in trillium flowers. Literally. 


 We also have azaleas beginning to show and spotted scores of fiddle head ferns, wild strawberries, and other dainty blooms unfamiliar to me.


 Then, as we were headed back up to the house, I spotted these purple flowers over near the fire pit my husband has been working on. Pardon the blurry pics- it was getting dark.


It looked orchid-like to me, so I promptly came inside and browsed some photos on the NC Native Plants Society website, and lo and behold, it is in fact a Showy Orchis!

Shucks, y'all. I just can't even find the words to describe how much I love it here and how perfect the mountains of North Carolina are! I can't wait to see what beauty is in store for us as the season progresses! 

Monday, April 29, 2013

My Minions

Friends and family have caught on to the fact that I am totally obsessed with vintage sewing related goods, and they either like to tell me way after the fact about the great thing/s they saw (not nice) or let me know when they have found something good and offer to pick it up for me (very, very kind!) This has worked out well for me a few times in recent history, as my sis posted this pic to Facebook a couple weeks ago, and when I called her blubbering, she went back and picked the li'l beaut up for me.
Okay, ok, so it doesn't look like a beaut here. Admittedly, it looks a bit of a dusty wreck, but the price was right. Even if I couldn't get it running, I had no fear that I could pull parts and sell them to recoup my investment. My sis gave it a general inspection that was guided by me over the phone, so I knew the light switch was broken and the wiring for the pedal was cracked and dry rotted. Still, the decals were in very good shape, she said, and there were only a few chips to the handwheel with the paint otherwise nice.

When I pulled it from the box, it looked like this...

But in just an hour or so, it was shined up rather well...
It was frozen and the handwheel wouldn't move. But a good oil bath and some gentle turning got it spinning along free and smooth. My husband rewired the pedal for me (thanks Sweets!). When he tested the motor, it wouldn't work, but a quick motor inspection showed that one of the brushes was not in contact with the copper. This is my second time going into a Featherweight motor- I am just too foolish to be afraid of messing anything up!  

Notice my trusty coffee can on the right here. If you ever decide to start pulling parts of a vintage sewing machine (and I absolutely think you should, unplugged of course) you must have a container right next to you in which to put every little piece and screw and thing-a-ma-jig that you remove. This is my best tip. Other than that, I kinda wing it....

I ended up needing to purchase the light switch, a bobbin case, some bobbins (I sold all mine with the white green), a spool pin spring, and a belt. All ordered from eBay, I expect all of my parts to arrive in the next few days, and I am very excited to try this new machine out. For those who are counting, this brings the total to 7 plus a serger :) But what a beautiful addition!

Now to get my hands on the box of 100 vintage sewing patterns a friend picked up for me at a yard sale this past weekend! 

Thursday, April 25, 2013

The Other Side of the Underwear Drawer a.k.a. Bra Sewing and a Giveaway!!!

Fellow seamstresses, do you sew your own underwear? You know I do. And, I won a prize in that contest I entered my undies in thanks in large part to yous guys. So, THANKS! I got a gift certificate to the Ohhh Lulu Etsy Shop, and I used it to purchase more patterns for more unders! It's a big circle!

So, what patterns did I get with my gift certificate?
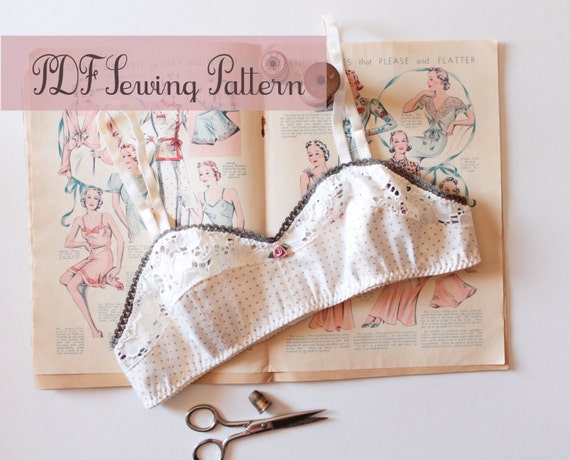
Ohhh Lulu's Bambi Soft Bra
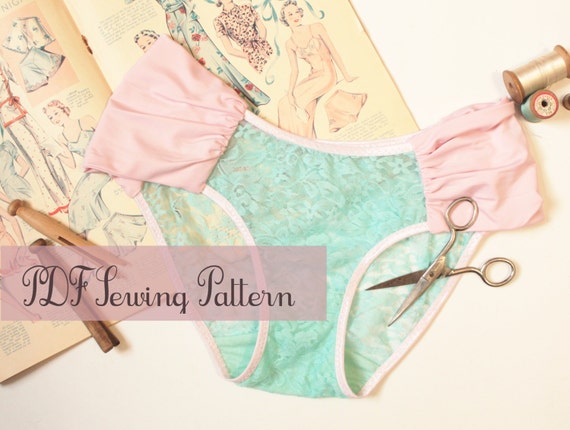
Ohhh Lulu's Sophia Panties
Aren't these patterns just gorgeous? I have made underwear and bras from both commercial and indie patterns, and I have found Sarah's to be right on in the sizing. If you are a lingerie sewing novice like myself, this eliminates a lot of fitting frustration and allows you to focus on sewing techniques. Of course you might need to tweak them some, but most are designed to be easy to alter.

And, here is my first (many more to come!) Bambi Soft Bra...


Yeah, it's hard to photograph a black jersey bra. I actually made it from an old top that I no longer used but was a very soft. I am sewing from a colorful elastic stash, so I chose this blue trim, and I actually like the blue and black a lot. I also skipped the back closure and simply sewed the back seam shut after applying elastic and trying it on to fit comfortably and snugly. The straps are self fabric tubes. This version of the bra is more of a lounge wear type for summer sleeping or wearing under comfy clothes. Now that I know I have a good fit, I'll make more with a greater investment in materials. FYI, this pattern is well drafted and easy to sew. The only tough part (for me) is always sewing on the elastic, but my machine decided not to skip stitches this time. I only wish I had made sure my bobbin was full on that top stitching. Practice makes perfect, right?

I also recently sewed some new panties from the Betty Pattern that I love so well. I have been a silk magnet lately- it seems every thrift shop I visit has 6 unloved yards of silk at some ridiculously low price, so I have been hoarding it. Well, with all that silk I decided to start sewing with the best of my fabric (on a tested pattern) and made these...

 The silk center panel is cut on the bias and the side panels are stretch lace. I love them!

Now, enough about my unders, how about yours? Interested in sewing some of your own? Well, you are in luck, as I am hosting a giveaway and the generous Sarah of Ohhh Lulu will be providing the pattern of choice from her shop to one lucky reader. To enter, please be a follower of my blog. Go to Ohhh Lulu at Etsy and look around, then come back and leave a comment on this post saying which of her patterns you would chose if you win. One entry per person please. Sarah has just released 5 new patterns- 3 more in addition to the two I chose. They are all lovely and include another style soft bra, a hipster panty, and a brazilian cut panty. Also, Etsy has just begun to offer an instant download option, so if you decide you can't wait for the giveaway to end, you can just buy a lovely pattern and print it out immediately. And then chose another.

I just want to say thanks again so much to Sarah for inspiring me to sew lingerie, for making fab patterns, and offering to provide a giveaway prize for you! Show her some love by following her blog, favoriting her shop, and/or liking her on Facebook. And thanks to you for reading my ramblings and providing the support you do!

So, there it is! I'll leave the giveaway open for a week- it will end Wednesday the 1st of May (Wha? May already?) Giddy up! Visit the shop, leave a comment, and thanks for reading! 

Tuesday, April 16, 2013

Spring Wildflowers and Vintage Bottles

The wee one and I picked some dandelions, pansies, and some other purple flower out in the yard today. It looks as though all of a sudden spring has sprinkled itself across the yard, and these little pretties are everywhere. I have written about my vintage bottle collection here before, and if you were wondering what one does with those, here is my favorite use...


 They are so cheery on the window sill above the sink or clustered on the dining table, and the bottles are the perfect size for tiny blooms with short stems. I am loving spring, but I suppose I say that about every season here, as I am fortunate and grateful to live in a place where each season of the year is positively beautiful in its turn. I hope you are getting some sunshine and warmth in your neighborhood too!

Monday, March 18, 2013

Look Mom- I'm In the N.Y. Times! Blazer to Peplum Jacket Refashion

Oh wait, Mom, so are you. In fact, it's the whole fan-dam-ily!

A few weeks back, my crazy fun family descended on Cape May N.J. for a fun filled wedding weekend in celebration of my older sister Jessica and her husband Alex's big day. The New York Times covered the event for it's Vows section.

It was a magical day, and therefore completely apropos that my sister arrived at the ceremony by unicorn. Don't believe me? See for yourself.

Photo Credit: Jessica Kourkounis for The New York Times
The wedding ceremony was on the beach, in March, in N.J. at 5 p.m. Holy flying unicorn, it was cooooolllllddd. I was raised in Maine, and I still froze my fanny off. Well, my powers of deduction are strong, and I knew it was going to be cold, so I decided 3 days or so before departing for the wedding that I needed a pretty jacket to keep me toasty on the beach. That didn't happen- I would have needed to make trench coat out of a sub-zero sleeping bag to stay toasty in that gale. Still, I looked nice! And you can't really see the frostbite in the photos.

Oh wait, yes you can. And damned if my husband didn't get a single full length shot of my dress and jacket. I don't fault him though; it's hard to focus when your eyes are frozen shut with happy tears. Luckily, I had taken several terribly lit before and after photos in my sewing dungeon.

Here is the before.

I knew I wanted something white, preferably wool, and also fitted or cropped. I browsed all my favorite thrifty spots, but didn't find anything. So, of course, the next logical thing to do when you are just about to leave for a 5 day road trip is to begin a major refashion project with no clear plan. And that's exactly what I did.

 I decided to focus on fabric, so for $3.50 I bought a lambswool blazer at Goodwill. It was quite large for me, so there was a lot of extra material to work with. Somewhere along the line I decided I wanted a peplum jacke because that sounded cute and formal and trendy. I really had no idea where to begin, but I didn't have very much to lose, so I forged on fearlessly.
 First, I removed the pocket. I unpicked it, shaved it. Yes, that's right, shaved it with a leg razor, and then lint rolled and steam pressed it. Buh bye pocket.
See, it's gone! Like magic! Alright, I know. Who cares?

See? Still gone! 
 Okay, moving on. Next, I removed both sleeves, marked the waist, and cut the jacket bottom off about an inch below it. It's easy for me to forget things like leaving seam allowances, so I took it really slowly.


Next, I harvested the fabric below the welt pockets for my peplum. I just measured from the bottom so it was even and cut straight across. Alright! I was moving and grooving! Except I still had to make this potato sack fit up top. The goal was fitted peplum, and this late 80s early 90s horror was fitted for my husband. And that is certainly not his look! 

I played with the bodice, pinning out here and there for a while. I knew I needed to keep the grain intact, but wasn't sure how to pull it off. Then I had a light bulb moment and .......


 unpicked the shoulder seam to add a dart there for shaping. This also pulled the front armscye closer to where it should be on me. Alright, okay, this might work out........ I basted the darts and everything else I did initially so that I could remove it and try something new if I flubbed up. 
I started to reattach fabric for the peplum. I pleated it for flare at the hip, and hid any seams in the pleats.
I ended up leaving the back and side seams of the peplum open. Stitched shut, there just wasn't enough fabric to keep it from hugging instead of flaring.

I ended up opening the back seam up later too. Remember, I had not yet frozen my fanny off at this point. 

I recut the sleeves at a  bracelet length using a sleeve from a pattern I had recently used, and I cut away the extra fabric at the armholes using the same pattern as a guide. This is the only part I don't love. I had to work with what I had, but I prefer a sleeve head with some loft. Still, they turned out better than I expected, and I ended up with a wearable jacket. Actually, I ended up with a jacket that I rather like. I have already worn it since we've been home, and I like it with jeans too!

Without further ado, here is a photo that was so poorly lit and  unflattering I had to crop off the top of my head.


I made a decorative stick pin to use as a closure. I just couldn't decide on a button, so this was a good non-permanent solution. I chose a pretty button, put a long ball topped pin through the shank, and used super glue to stick them together. Also, I prefer to wear it with the lapel unrolled, but maybe that's just because I was freezing and needed that surface area covered. Actually, I think it seems right for this style.

So, here is a before and after....

and here I am with my sis the lovely bride, a unicorn, hubby and the kid.

Photo Credit: Alex Smith
I love this pic, but brrrrrrrrrr! Even Pebbles the Unicorn looks cold!!!! The things we do for love!