Pages

Showing posts with label sewing. Show all posts

Thursday, October 2, 2014

The "Match the Garment to the Pattern" Game


Have you ever come across a hand sewn vintage garment that you could match to a pattern? I thought I had matched a garment to its pattern once, but I was wrong (and later found an ILGWU label in the skirt of that set).

The other day, while out thrifting, I found a pile of patterns and proceeded to rifle through them, choosing which ones would follow me home. After finishing that up, I took a peek at the dress rack in the shop, to see if there was anything fabulous on it. Lo and behold, there was a very familiar looking dress there...

In fact, there was a pair of them. 


I rifled back through those patterns I had just picked up, and found the match. It surely helped that the seamstress had taken the pattern illustration's color suggestion! 

Have you ever matched a pattern to a vintage dress in the wild? 

Friday, September 19, 2014

Cheap & Easy Vintage Pattern Storage

I have A LOT of vintage sewing patterns. I know I am not the only one! It has been discussed in various interwebby places that these are articles that should be preserved. There is the whole "to trace or not to trace debate" (we aren't going there today), and there are various opinions on pattern storage. People store their patterns many different ways- today, I'm going to tell you how I store mine. It is a cheap and easy method, because I am a cheap and easy kinda girl.

First of all, I have to separate my personal patterns from my shop patterns. I have two separate filing cabinets for this- one two drawer narrow model and one four drawer narrow model. In the two drawer, the top is mine, and I have my patterns divided by garment type. In the bottom drawer, I keep patterns for my daughter on one side organized by age and (a few sad) patterns for my husband on the other side.
Pretty on the Inside
In the large filing cabinet I have all of my shop patterns organized numerically regardless of brand, and oversize Vogues and other types are kept numerically ordered in their own spot in the back of the top drawer. I don't have a huge pattern shop (yet! I need to get some listings up!!!), and I used to just put them in storage as I counted them and root through later to find the one I wanted. This is so much better. My husband went through and organized them all for me. Isn't that sweeeeeet?


One day, I hope to buy a real pattern cabinet, but, being a dunce I have passed over two already that sold for a few ten-spots, and I will probably never see another one for sale again because I don't deserve it.

Moving on- all of the organization stuff is well and good, and we all do that our own way. However, I have a little handy storage tip. After counting each pattern, I place it in an acid free binder sleeve from the Dollar Store, usually sideways, with the excess folded in back. They cost about 5 cents apiece.
Image From Dollar General's Website

All my gals, snug, well ordered, and happy!

This affords a snug fit for the pattern and prevents any further jingle jangly wear and tear. Also, the acid free, moisture resistant storage helps keep them looking their best, and hopefully preserves them for future generations of seamstresses and seamsters. I usually just leave the 3 ring white edge on, but I trim them neatly prior to sending them to their future homes. I store two rows side by side in the cabinet. The McCall's creep into the other row, but I have more Simplicity than anything else, so it isn't a big problem.

So, this is how I do it. What are your tips for pattern storage and preservation?

Monday, September 15, 2014

Sorbetto Bow Blouse

I have played with the Sorbetto Top by Colette Patterns a fair amount now. I have it so I really like the fit, which involved angling the darts more (much more flattering to a small/medium bust) and lowering the underarm. I have made it as a back button blouse, 


a pajama top, and even a dress! 

Because the fit is good, I feel comfortable testing my amateur pattern manipulation skills on it. 

For my latest version, I decided that I am over the bias binding at the neck and arms. It always feels constricting and causes pulling. Instead, I drafted facings. I also raised the back neck 3 inches and lowered the front neckline about an inch and a half. I underlined the sheer, crepe fabric I used with a mystery navy lining purchased in the thrift (that's where the polka dot fabric came from, too). I used the glue trick to marry the two except at the darts, where I hand basted. From there I used french seams on the shoulder and side seams, stitched in the facings which were serged along the lower edges, hand hemmed the bottom with lace hem tape, and neatened it all up by stitching the facings and hem to the underlining. 

For a little more personalization, I stitched a rectangle, top and bottom, at the neckline and made a long tie to go with it so I could have a bow blouse. 


I love how this top turned out. It is easy to wear and, to me, looks polished and classic. These are adjectives I would like to be able to apply to my wardrobe more often, and I am trying to sew up some versatile basics. 

Saturday, August 23, 2014

Two Piece Summer Halter Dress

Over the summer I was called away from home on some unpleasant business that took me out of state for five weeks. I knew I didn't want to be without my sewing for that long, so I packed up my trusty vintage Kenmore portable along with a bursting at the sides compact tin box of fabric and notions.

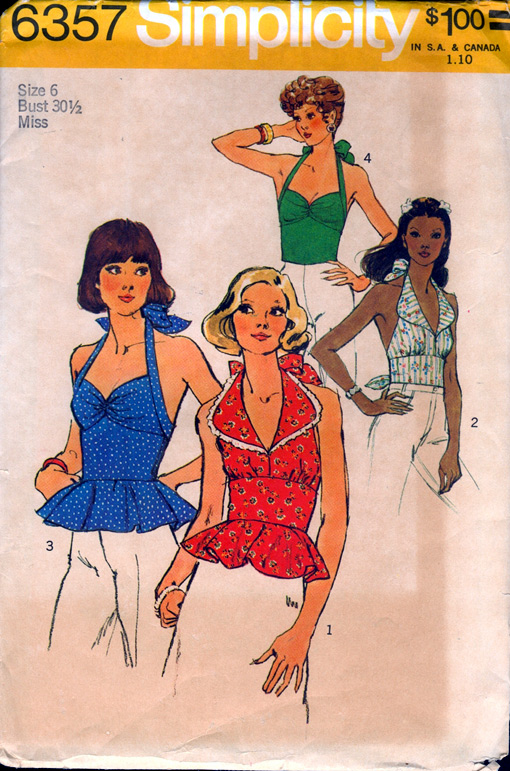
I had already begun Simplicity 1365 ( a reproduction of 6357, which I also own) in a light cotton fabric I picked up.....wait for it...... in the thrift shop. I wanted to attempt to make a halter style that could be worn without a bra, so I made cups out of bamboo batting and sandwiched them between the fashion fabric and my muslin lining.


 The rest of the process was pretty straightforward. There were times when I followed the repro pattern instructions, and parts where I looked back at the vintage pattern instructions, which were less beginner friendly and more dressmaker appropriate. All in all, it makes for a very well finished garment with all seams enclosed in a nice cotton lining. Drat. I should have photographed the inside.

Anyway, I paired the halter up with a simple dirndl skirt made up from what I could eek of the remaining fabric. I love this skirt. It is so comfy and closes only with a pants hook and snaps. Here are a few finished pics.
Halter with high waist vintage 70s jeans, or as my sis calls them, my "mom jeans."

the perfect outfit for that insane Florida heat 

 After I finished this get up, I promptly went and ate an enormous ice cream in celebration.
A perfect end to a lovely project. 

Oh, and just because I am so sososossosososososososososos super excited, can I show you what I bought?  Can I pleasepleasepleasepleaseplease? 
I LOVE her. How lucky can one gal be? A Wolf form, in my size.... I love her. She was an absolute steal, and I feel so fortunate. Anyone looking for a Singer adjustable????

Friday, August 15, 2014

Retro Pajamas for Meeeeeeeeeeeeee!

I purchased a pile of vintage knit fabric at auction a couple months back. Some was, of course, quite hideous, while some was kitschy retro cute. I do recognize that this is in the eye of the beholder, though. 

For a quick, easy project, I grabbed a medium weight spongy retro knit and stitched up this nightgown using Simplicity 7096.


Well, I mostly just used the yoke pieces, as I cut the yardage to a length I thought would be comfortable (somewhere between views A and B), and cut equal front and back panels from the width. The fabric was pretty wide, so I got both the front and back from one length. Then I used the pattern as a template for the underarm. 

This was stitched entirely by machine using the "burrito method" I learned from Janet Pray's Sew Better, Sew Faster Craftsy Class. There's not too much to say about construction. For a sweet touch, I included some leftover ric rac trim across the yoke and pressed and stitched it down in a bow motif. I added one of the vintage buttons from my stash, and the gown was done. Now all I need are some fuzzy slippers and hair curlers!


Thursday, June 12, 2014

"Soogar Skulls Sirt"

The little one is still working on her "s" sounds. I love her little voice. I know that, as well as she speaks now, she will soon have all the kinks worked out, and those cute kid-isms will be gone forever. In the meantime, I sewed her a shirt that has her practicing those "s" sounds. 
I used two $1 Walmart bandanas for the body of the shirt. The sleeves are raw silk from a pile I bought a few years ago at the thrift, and the fabric is super soft. I serged the innards for tidiness, and I couldn't resist using one of the tacky "by Mother" tags I found a few days ago. 

The pattern is the Ella Raglan Top by I think Sew. I have already lengthened it and cut a dress from one of hubby's old work/dress shirts. It is a nice pattern, quick and easy to sew, and great for using small amounts of fabric or repurposing. I'll likely make another just like this in green bandana fabric shortly. 

I bought some new patterns recently and am excited to dive head first into summer sewing projects!

Tuesday, June 10, 2014

Favorite Sewing Tools and Tips

Have you ever tried putting Scotch 1/2" tape on a zipper seam as a guide? I always had a hard time making my stitching straight with only a zipper foot and no real guide. This goes on easily, helps one stitch an even 1/4" to either side of the zipper opening, and then peels right off. Give it a try!
I am in the process of sewing a very "Princess-y" dress for my daughter from a brand new Simplicity release. Pics to follow when it is finished!


Saturday, May 25, 2013

Summer Sewing Big & Little

I needed some high waisted shorts to go with that 40s Fun-Shus blouse, so I threw this green denim pair together on Saturday. I used McCall's 8331 again.
I added a ribbon waistband using a fun lipstick print instead of a facing, and I hand picked the zipper. I think since the first several zips I sewed were hand picked, I just don't like the way a machine sewn zip looks most of the time. We all have our hang ups.
I also made the tank up from a thrifted tee. I did a little embroidery on top of the screen print just for fun.
It's been raining A LOT, and I didn't get any good pics, but you get the idea. 
I did some pattern work on the shorts after this to replace the darts with seams, and the next pair I make will have piping in the seams. I'd like to incorporate this piping, which I made by covering white store bought piping with white lace. I think it would look really pretty using contrasting colors of piping and lace too. I originally made this corded piping for my bridesmaid's dress, but didn't end up using it then. I did use some on an Itty Bitty project I whipped up the other night though.
My little bunny got a 24 hour stomach bug a few days back. She projectile vomited in the hall, and finished the day with a fever of 103.9. Yikes! As she slept a lot being sick, I took the opportunity to sew her a pretty dress to help her feel better. I used the Itty Bitty Toddler Dress Pattern from Made by Rae after seeing a sweet baby version on the blog Tilly and the Buttons. I seriously love sewing things while my daughter is sleeping and hanging them up in her room for her to find in the morning. She gets excited and always wants to wear them right away!


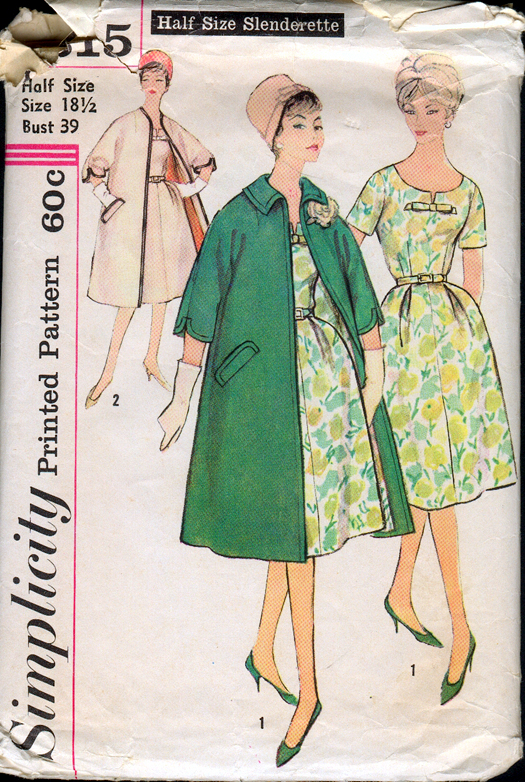
 Totally unrelated to anything- in counting some patterns for my Etsy shop recently, I discovered that, sadly, Simplicity 3315 was missing the dress pieces, and contained only the pattern for the coat.
Image courtesy of the Vintage Pattern Wiki
It is a size 14 1/2 or 35 inch bust, and anyone who would like to try sewing up the coat can have it. Leave me a comment with your email address, and I'll contact you to get your mailing address. Is it just me or does anyone else think this would make a particularly classy and glamorous raincoat? Search laminated cotton to find inspiration for some lovely rain wear. 

Wednesday, May 15, 2013

I Heart the 40s / Sewing up the Fun-Shus Fabric

I have been sewing steadily along as I always do- tank tops, a bathrobe for the little one, a halter top pdf pattern that I am testing, etc. I enjoy it, but sometimes sewing practical items really starts to grate on my nerves. Yes, I probably need more knit tops, but what do I want? I want Fun-Shus.

A few days ago, upon receipt of the final part I needed to get my lovely 221-1 Centennial Featherweight actually sewing, I decided to do something a little bit frivolous and to bust out some of my prized stash fabric. I chose the Fun-Shus fabric I found at a thrift store January of 2012 (what? over a year ago?).

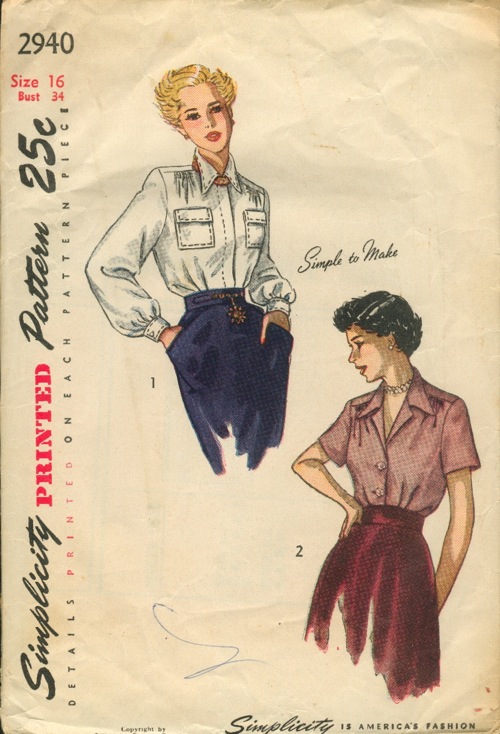
 I chose this pattern, thrifted within the last few months.
And, I made it up on this pretty, thrifted long distance, which hums like a bee.
And I came up with this...

Don't fear the shoulder pad, my dears. And can I just say it? I love a wing-y collar. I do. 

I love the blouse-y effect of the tucks. No, you can't see it here. My arm is totally in the way.  

It's so stinking gorgeous here right now, and I love my deck! I love lots of things! Love is good!


Innards. Collar and button placket interfaced with an old cotton bed sheet.
Edges serged. A fair amount of hand-stitching. Me-made shoulder pads using Casey's tutorial.  

Here's another close up of that FAB-ric, and the vintage yellow buttons I chose to go with it. 
This was so fun to make- it has me feeling all jazzed up about sewing again. That's right. Jazzed up. You thought "jazzed up" was just for little old ladies with cat applique sweatshirts? Well, it's for Fun-Shus too. How about you? What are you jazzed up about right now?

Edited 5/25/13 to add: This project was featured on Sew Country Chick's Sew and Tell Saturday! Thanks Justine!

Monday, April 29, 2013

My Minions

Friends and family have caught on to the fact that I am totally obsessed with vintage sewing related goods, and they either like to tell me way after the fact about the great thing/s they saw (not nice) or let me know when they have found something good and offer to pick it up for me (very, very kind!) This has worked out well for me a few times in recent history, as my sis posted this pic to Facebook a couple weeks ago, and when I called her blubbering, she went back and picked the li'l beaut up for me.
Okay, ok, so it doesn't look like a beaut here. Admittedly, it looks a bit of a dusty wreck, but the price was right. Even if I couldn't get it running, I had no fear that I could pull parts and sell them to recoup my investment. My sis gave it a general inspection that was guided by me over the phone, so I knew the light switch was broken and the wiring for the pedal was cracked and dry rotted. Still, the decals were in very good shape, she said, and there were only a few chips to the handwheel with the paint otherwise nice.

When I pulled it from the box, it looked like this...

But in just an hour or so, it was shined up rather well...
It was frozen and the handwheel wouldn't move. But a good oil bath and some gentle turning got it spinning along free and smooth. My husband rewired the pedal for me (thanks Sweets!). When he tested the motor, it wouldn't work, but a quick motor inspection showed that one of the brushes was not in contact with the copper. This is my second time going into a Featherweight motor- I am just too foolish to be afraid of messing anything up!  

Notice my trusty coffee can on the right here. If you ever decide to start pulling parts of a vintage sewing machine (and I absolutely think you should, unplugged of course) you must have a container right next to you in which to put every little piece and screw and thing-a-ma-jig that you remove. This is my best tip. Other than that, I kinda wing it....

I ended up needing to purchase the light switch, a bobbin case, some bobbins (I sold all mine with the white green), a spool pin spring, and a belt. All ordered from eBay, I expect all of my parts to arrive in the next few days, and I am very excited to try this new machine out. For those who are counting, this brings the total to 7 plus a serger :) But what a beautiful addition!

Now to get my hands on the box of 100 vintage sewing patterns a friend picked up for me at a yard sale this past weekend! 

Thursday, April 25, 2013

The Other Side of the Underwear Drawer a.k.a. Bra Sewing and a Giveaway!!!

Fellow seamstresses, do you sew your own underwear? You know I do. And, I won a prize in that contest I entered my undies in thanks in large part to yous guys. So, THANKS! I got a gift certificate to the Ohhh Lulu Etsy Shop, and I used it to purchase more patterns for more unders! It's a big circle!

So, what patterns did I get with my gift certificate?
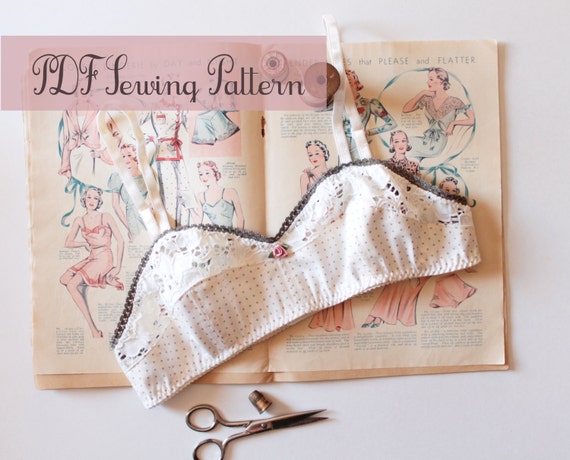
Ohhh Lulu's Bambi Soft Bra
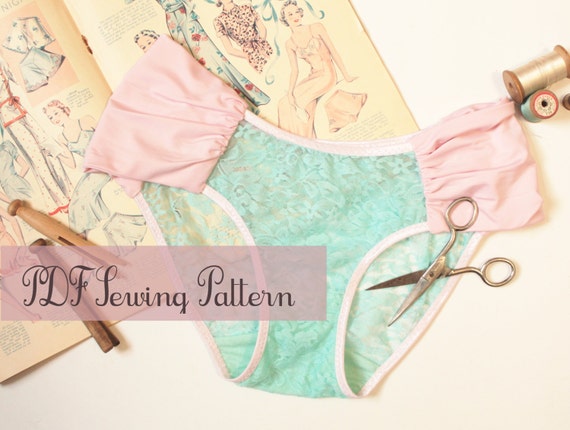
Ohhh Lulu's Sophia Panties
Aren't these patterns just gorgeous? I have made underwear and bras from both commercial and indie patterns, and I have found Sarah's to be right on in the sizing. If you are a lingerie sewing novice like myself, this eliminates a lot of fitting frustration and allows you to focus on sewing techniques. Of course you might need to tweak them some, but most are designed to be easy to alter.

And, here is my first (many more to come!) Bambi Soft Bra...


Yeah, it's hard to photograph a black jersey bra. I actually made it from an old top that I no longer used but was a very soft. I am sewing from a colorful elastic stash, so I chose this blue trim, and I actually like the blue and black a lot. I also skipped the back closure and simply sewed the back seam shut after applying elastic and trying it on to fit comfortably and snugly. The straps are self fabric tubes. This version of the bra is more of a lounge wear type for summer sleeping or wearing under comfy clothes. Now that I know I have a good fit, I'll make more with a greater investment in materials. FYI, this pattern is well drafted and easy to sew. The only tough part (for me) is always sewing on the elastic, but my machine decided not to skip stitches this time. I only wish I had made sure my bobbin was full on that top stitching. Practice makes perfect, right?

I also recently sewed some new panties from the Betty Pattern that I love so well. I have been a silk magnet lately- it seems every thrift shop I visit has 6 unloved yards of silk at some ridiculously low price, so I have been hoarding it. Well, with all that silk I decided to start sewing with the best of my fabric (on a tested pattern) and made these...

 The silk center panel is cut on the bias and the side panels are stretch lace. I love them!

Now, enough about my unders, how about yours? Interested in sewing some of your own? Well, you are in luck, as I am hosting a giveaway and the generous Sarah of Ohhh Lulu will be providing the pattern of choice from her shop to one lucky reader. To enter, please be a follower of my blog. Go to Ohhh Lulu at Etsy and look around, then come back and leave a comment on this post saying which of her patterns you would chose if you win. One entry per person please. Sarah has just released 5 new patterns- 3 more in addition to the two I chose. They are all lovely and include another style soft bra, a hipster panty, and a brazilian cut panty. Also, Etsy has just begun to offer an instant download option, so if you decide you can't wait for the giveaway to end, you can just buy a lovely pattern and print it out immediately. And then chose another.

I just want to say thanks again so much to Sarah for inspiring me to sew lingerie, for making fab patterns, and offering to provide a giveaway prize for you! Show her some love by following her blog, favoriting her shop, and/or liking her on Facebook. And thanks to you for reading my ramblings and providing the support you do!

So, there it is! I'll leave the giveaway open for a week- it will end Wednesday the 1st of May (Wha? May already?) Giddy up! Visit the shop, leave a comment, and thanks for reading!